
This ramen bowl was the result of weeks of researching traditional and fusion ramen bowl recipes to come up with a savory vegan broth that used all natural ingredients. The end product was an umami packed bowl of broth made with all common and easy to find ingredients. Granted, I know it’s a bit more complex than what people want in a recipe, but read through the ingredients and process and tweak as it fits your needs! I’m going to write this a bit out of order, because I’m guessing you’re here for the broth and bowl, but if you stay to the end of this I also go through the process of making your own ramen noodles and a basic veggie stock.
The Broth
Ingredients
- Pulp from 1 roasted eggplant*
- 12 cups low sodium veggie stock
- 1 bulb/head of garlic peeled
- 2 Tbl grated or minced ginger
- 20 pieces of dried shiitake mushrooms
- 1 sheet kombu (edible kelp)
- 1/4 cup low sodium soy sauce
- 1 Tbl sesame oil
- 1 Tbl miso paste
- 4 Tbl nutritional yeast
- 2 Tbl sweetened rice vinegar
- 1 large sheet nori (added at the end)
Instructions
Add all ingredients to stock pot, cover, and bring to a boil then lower heat. Simmer for 1 hour. Add nori sheet and let sit, covered, for 10 minutes. Strain through a fine mesh strainer, or a colander then cheese cloth. I strained mine twice to remove all particulate.
*Each ingredient adds a different component to the complex end result umami flavor. You can omit some of the ingredients, but you will also miss a building block in your broth. The roasted eggplant can be skipped, but it does add a pleasant, slight bitterness as well as a the caramel from the roasting process. It seems like an entire head of garlic would be too much; however, it’s being boiled into the broth and then strained out.
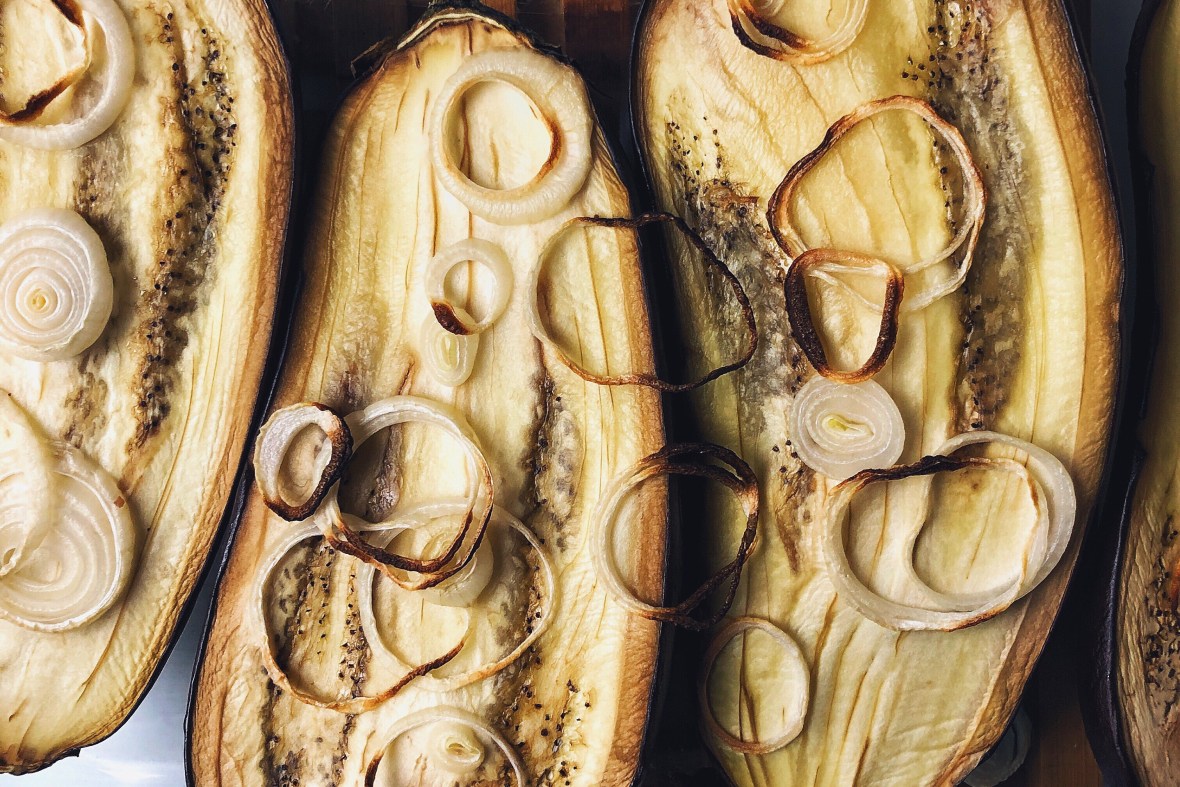
*Roasting Eggplant: Preheat oven to 400 F. Slice eggplant longitudinally. Place pulp side up on baking sheet or in a pan. Brush pulp side with a light amount of olive oil. Can also add rings of onion on top of the pulp side. Roast for 30 minutes. Let cool then, using a spoon, scoop pulp away from the skin. Use immediately or store in air tight container in refrigerator for up to two weeks.

The Ramen Bowl
In the picture
- Snow peas
- Thin sliced shiitake mushrooms
- Carrot strips using a vegetable peeler
- Matchsticks of kohlrabi
- Baked firm Chinese tofu with a thin hoisin sauce glaze* and toasted sesame seeds
- Pickled ginger
- Curls of green onion tops
- *In the picture but you can’t see: 1 Tbl Tare* and 1 tsp chili oil
What I love about making my own ramen bowls is that there really isn’t any “right” way to make them. Basically, it’s the beloved Buddha bowl but with broth in it. When I make a ramen I think about how what I’m adding will complement the broth and the other ingredients. Most of the time I just say screw it and toss in veggies and tofu and slurp it all up cuz I’m hungry.
What you see above was made in the bowl. You don’t make a soup and then spoon it into a bowl. You build the bowl, add the noodles, then the stock, and top with garnish and some other ingredients. You want your veggies to be fresh and still have crunch. Your broth should be boiling hot so that it’ll flash cook the veggies in the bowl. Eat your bowl immediately!
*Preheat oven to 425 F. Drain and cube tofu to desired size. Place on parchment paper. Bake for 10 minutes, turn, bake another 5 minutes. Scoop into bowl and lightly toss in a watered down hoisin sauce. Return to making sheet and bake for 10 minutes. While still hot sprinkle on toasted sesame seeds.
*Tare (hard to find in America) can be purchased or easily made at home. This is a super simplified version of Tare, but it’ll get the job done if your ramen bowl needs just a little bit more salty taste: 1/4 cup soy sauce and 2 Tbl mirin. This can be added to your ramen bowl tablespoon by tablespoon or skipped. It’s a preference thing.

Making your own veggie stock
Anytime you cut veggies and have the little bits and pieces that you’re tempted to just throw away, store them in a gallon ziplock bag. That wilted stalk of celery? Into the bag! The green beans that aren’t rotten but just don’t look pretty? Bag ’em. Once your gallon bag is full you’re ready to make stock. The ends of the carrots that you normally toss? Bag those bits.
Rough chop an onion. Can leave the skin on even. Put the onion bits, the frozen bag of veggies, and 12 cups of water into a pot. Cover and simmer for 60 minutes. Let sit with the pot covered for an additional 30 minutes. Strain through a colander and use a wooden spoon or heavy spatula to press the veggies to get as much liquid out of them as possible. Dispose of the veg bits (perfect for compost). Strain again but use a fine mesh strainer or cheese cloth. You want your stock to be free of particulate. Store in air tight container, preferably mason jars, for up to a month in the refrigerator.
*This stock is salt free! Most soup recipes assume your stock is salted so you’ll have to modify your soup if necessary.

Making Ramen Noodles
Ingredients
- 3 cups Type 00 flour
- 1 cup boiling water
- 1 1/2 Tbl sodium carbonate*
- 1/2 tsp salt
Instructions
Boil water and measure out 1 cup. Add 1 Tbl sodium carbonate* and stir immediately. Make sure there are no pieces in the water. Stir until water is clear. Whisk salt into flour. Add water mix (kansui) to flour and mix. Can be done by hand mixing, but I’ve found the end results are even better if you use a food processor or stand mixer. Plus, it’s much faster! Mix until a rough dough forms then hand knead until dough is smooth. Flatten to 1″ thickness and place in ziploc bag and let rest on counter for 1 hour. Can be refrigerated for up to a week, but the dough is much easier to work with if used that day.
When you’re ready to cut your ramen you can use a pasta roller (manual or attachment) or roll it out thin with a long rolling pin. This dough is very soft and easy to work with. I used my Kitchen Aid spaghetti cutter to make my ramen noodles. Flattened to setting 3, let the sheets dry on my counter for 10 minutes, then cut using the attachment. You can cut them by hand to whatever desired width you’d like, but skinnier the better.
So, this seems a bit “try too hard,” but really these noodles are worth the little bit of extra time. They tasted fresh and added their own unique flavor to the ramen bowl that I haven’t tasted from the packaged variety. Plus, I have the pasta attachments and I like making pasta noodles.

*To make your own ramen you’ll need to first make Sodium Carbonate. To do so all you need to do is bake…baking soda. The heat from baking changes the Sodium Bicarbonate in the box to Sodium Carbonate which behaves much differently. Skipping the Sodium Carbonate will dramatically alter your noodles and they will NOT turn out like ramen noodles. Chances are they will just turn to mush once they hit the hot water. I know, I’ve tried.
What is Sodium Carbonate? What’s it do?
Traditional ramen noodles are made using KANSUI which is an alkaline water that is not the same as what you typically see in the healthy water section of the grocery store. Kansui mimics the well water in Japan from back in the day. The water is infused with approximately 80% sodium carbonate and 20% potassium carbonate. Both are alkaline solutions that gives ramen noodles their distinctive yellow color, springy texture, and distinct taste and aroma. I think it’s kinda fishy, but not like too fishy. I don’t like fish. We can mimic Kansui by creating sodium carbonate which is in the same general arena as food grade lye. Not the same, but it gives you a point of reference. Lye, sodium hydroxide, has a ph of 13, whereas sodium carbonate has a ph of 10.5. Potassium carbonate can kinda be made at home but you’d have to burn leaves and branches and sacrifice a cooking pot to make it. Not worth it.
Instructions for making your own Sodium Carbonate
Preheat oven to 250 F. Line baking sheet with aluminum foil or parchment paper. DO NOT SKIP THAT STEP because you could ruin your baking sheet. Measure out 1/4 cup baking soda and sprinkle in an even layer on lined baking sheet. Bake for 60 minutes. Let cool. Then, without getting it on your hands, pour it into a glass storage dish. I use a glass jelly jar.

If you read all this and enjoyed please comment below. I’d love if you subscribed to my YouTube channel too!
Beginner Ramen Bowl video
Yummy and looks so easy to make.