
Cake made from scratch just hits different. It’s more dense than a box mix cake, because there aren’t any weird chemical stabilizers. But, that’s the way cake should be! You should have a slice and know you had cake. It should melt in your mouth and have lots of flavor. However, I know people are used to box mix cake, so I designed this recipe to have more fluff than dense and a lot of vanilla flavor. It’s light, moist, and really easy to put together. It has limited ingredients and there’s nothing weird or complicated steps to follow. Plus, the final result is a pleasant yellowy color without any artificial coloring!


I made this cake for my 40th birthday, so I obviously had to go all out with piped frosting flowers. If you have a Wilton #104 frosting tip and some extra time you too can make all sorts of roses, but you can just enjoy the cake with the recipe’s buttercream frosting. I wanted pretty because this bearded 40 year old is the prettiest of the princesses and deserved a fancy cake. Amiright. The flowers are my favorite part and I warn you advance that you’re going to see a lot of cake pictures in this post. Sorry, not sorry.


Here’s the recipe for the vegan meringue frosting I used for the flowers. This made enough frosting for about 20 medium sized roses.
- 1/3 cup water
- 2 tablespoons Vor vegan meringue powder
- 6 cups powdered sugar
- 3/4 cup shortening
- 1/4 teaspoon salt
- 1/4 teaspoon almond extract
- 1/4 teaspoon vanilla
Whip the water and meringue powder until there is a thick foam and all of the powder is absorbed. Mix in the salt and extracts. Alternate powdered sugar and shortening until it is completely mixed. It will be a thick and stiff frosting. Separate frosting based on colors and make sure to keep covered between use because it will dry out. Pipe your flowers and let them dry overnight for stiff frosting designs that you can pick up.

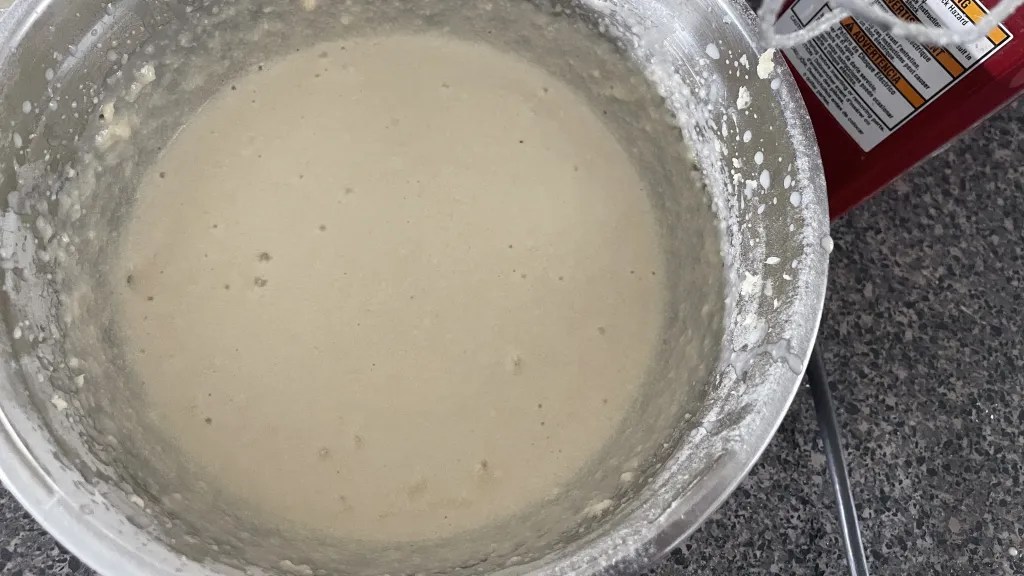
The cake recipe is fairly standard in terms of mixing. I replaced the egg with aquafaba, the liquid from a can of chickpeas, which I whipped into soft peaks. Then the rest is standard. Mix the dry ingredients well, sifting is best to make sure there are no clumps and the leavener is distributed, then fold in the wet ingredients and then the aquafaba.

Why aquafaba? When replacing egg in a baking recipe you need something to bind the ingredients and add volume without density. Applesauce is a common replacement, but it can make a cake more dense. My goal was light and fluffy. So, I went with aquafaba because it’s a liquid that turns into a volume when whipped. Folded into batter that volume is mostly kept which helps a batter remain airy, kind of like a whipped egg white.

What is aquafaba and how does it work? I’m glad you asked. When chickpeas sit in that can the proteins and fiber mixes with the water and creates a thick liquid. That’s why when you pour it out it’s thick. I doesn’t make a cake taste weird or like chickpeas. There’s really no flavor to it. But, when whipped that protein and fiber creates an emulsified liquid that traps air and gets to the soft peak stage of whipping. Gently folding it into a batter gives the batter more air prior to baking which makes a lighter and fluffier baked good. It doesn’t work for all recipes though, so don’t just start swapping aquafaba for egg whites in recipes. It works best in a recipe that is a 2:1 flour to sugar ratio and low oil content. This cake recipe for example.

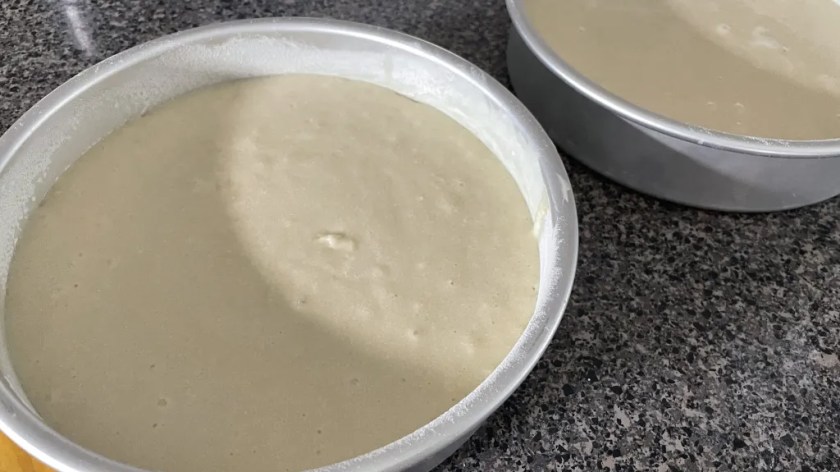
I’ve added here the picture steps for the cake recipe. I know it’s helpful to see the process and compare what you’re doing to the pictures when you’re unfamiliar with or not confident baking.


As with any baking recipe, make sure that you read through all the steps prior to jumping into putting ingredients together. Make sure your oven is preheated, pans are prepared, and you have all of the ingredients out. This mise en place (French for “in its place”) process gives you the greatest success, because nothing is worse than getting half way through mixing ingredients and then realizing that you don’t have something or your oven isn’t ready.

Vegan Yellow Cake
Equipment
- 2 8" cake pans, or 9" cake pans Size depends on preferred height of layers
Ingredients
- 2 1/2 cups all purpose flour (or 1:1 GF baking flour)
- 1 1/2 cups sugar
- 3 1/2 teaspoons baking powder
- 1 teaspoon salt
- 1 1/4 cups non-dairy milk (I used oat milk)
- 1 tablespoon vegetable oil
- 1/2 cup vegan butter (room temp softened)
- 1 tablespoon vanilla extract (I used clear)
- 3/4 cup aquafaba (liquid from chickpea can)
- 1 teaspoon cream of tartar (helps whip aquafaba)
Vegan Buttercream Frosting
- 1 cup vegan butter (room temperature softened)
- 1/2 cup vegetable shortening (or 1/2 cup butter)
- 5-6 tablespoons non-dairy milk (I use oat milk)
- 1 tablespoon vanilla (I use clear)
- 1/4 teaspoon almond extract
- 5-6 cups powdered sugar
Meringue Frosting Flowers
- See blog post for recipe
Instructions
- Preheat oven to 350°F. Oil or grease 2 8" cake pans (or 9" pans). Cut out a round of parchment paper to line the bottom of the cake pan. Dust with flour to coat the inside of the pans and tap out any remaining flour that isn't sticking. You want a light coat of flour for the batter to cling to as it rises to ensure an even rise and no "dome" in the center.
- Sift together the flour, sugar, baking powder, salt. Double sift for best results.
- In a large mixing bowl whip the butter until smooth and no chunks are visible. Scrape the sides and whip again. Mix in the milk, oil, and vanilla.
- In a separate bowl use a hand mixer or stand mixer to whip the aquafaba and cream of tartar until soft peaks form. See blog images for an example.
- Mix the dry ingredients, not the aquafaba yet, into the wet ingredients. Start with 2 cups of the dry ingredients and mix until smooth. Add the remaining dry ingredients and fold them in until no dry is visible. It will be thick but don't overmix.
- Fold the whipped aquafaba into the batter. Don't mix. Fold by scooping the batter from the bottom of the bowl up and then through the aquafaba. The goal is to keep as much of the fluffy aquafaba still fluffy and aerated. This will help your cake stay light.
- Divide the batter between the two prepared cake pans. Jiggle the pans a little to spread to the sides.
- Bake on the center rack of the oven for 30-35 minutes for 8" pans and 25-30 minutes for 9" pans. An inserted toothpick or cake tester will come out clean. Allow to cook on a wire rack in the cake pans for 15 minutes before removing.
- Remove the baked caked by placing a wire rack on top of an individual cake pan and flipping. The cake should come out of the pan. Remove the parchment paper. Use a wire rack on the bottom of the cake and flip again to get the cake with the top up. Repeat with the other pan. Allow to cool to room temperate before frosting or wrapping to freeze.
- Frost, decorate, and enjoy!
Buttercream Frosting
- Whip the butter and shortening (or all butter if preferred), scrap sides and whip again. Make sure there are no chunks of butter. Mix in the milk, vanilla, and almond extract. Mix in 1 cup of powered sugar at a time until it reaches your desired consistency. A softer frosting is easier to get on a cake but it might squish out in the center creating a bubble along the edge of the cake. I prefer a more firm frosting at least for the center to help support the weight of the layers.
- When I frost a cake a don't like to cut my layers to make then flat. It's wasted cake and almost a guarantee for crumbs in the frosting. Instead I'll put frosting on top of the bottom layer, flip the top layer so that the "top" is facing the bottom layer, and then your flat cake bottom is the top of the cake. You don't get that perfectly horizontal frosting layer in the middle, but no one will notice. A flat cake top just looks nice.
Notes

Want to get emailed when a new blog post is out? Subscribe below!
Want lots of pretty food pictures? Check out my Instagram page! I post often and most posts have a recipe attached. If you make this cake or any of my other recipes make sure to tag me in a post and let me know! I love when people make my recipes.